LETTER A:
I took the Aa template and the children stamped red apples onto it. Then they used their finger prints in black ink to make ants climbing up the side of the letter A. We glued it to a big piece of red construction paper in the shape of an apple.


For H I was having a hard time figuring out what to do, but finally came up with... H for horse. I took a plastic horse I have and the kids got to put the "Hooves" in a bowl of paint, then have the "Horse" stomp around the letters Hh. The kids had fun and when their parents ask what starts with H they'll show them the Horse's Hooves! I also wanted to put something around the outside of the Hh template so we used stamps of a house and another horse.

LETTER J:
I cut the template of Jj into pieces like a Jigsaw puzzle. Then the kids glued it back together
and colored it in with markers last.


LETTER Q:
I cut up pieces of different fabrics. The children choose their fabric pieces and glued them onto the Qq template making a Quilted Q!
LETTER R:
Take Red paper and have the children Rip it. It is a great exercise for their small finger muscles that they are needing to build for writing. After ripping the red paper they glue it onto the Rr template. Easy and they have fun.


LETTER X:
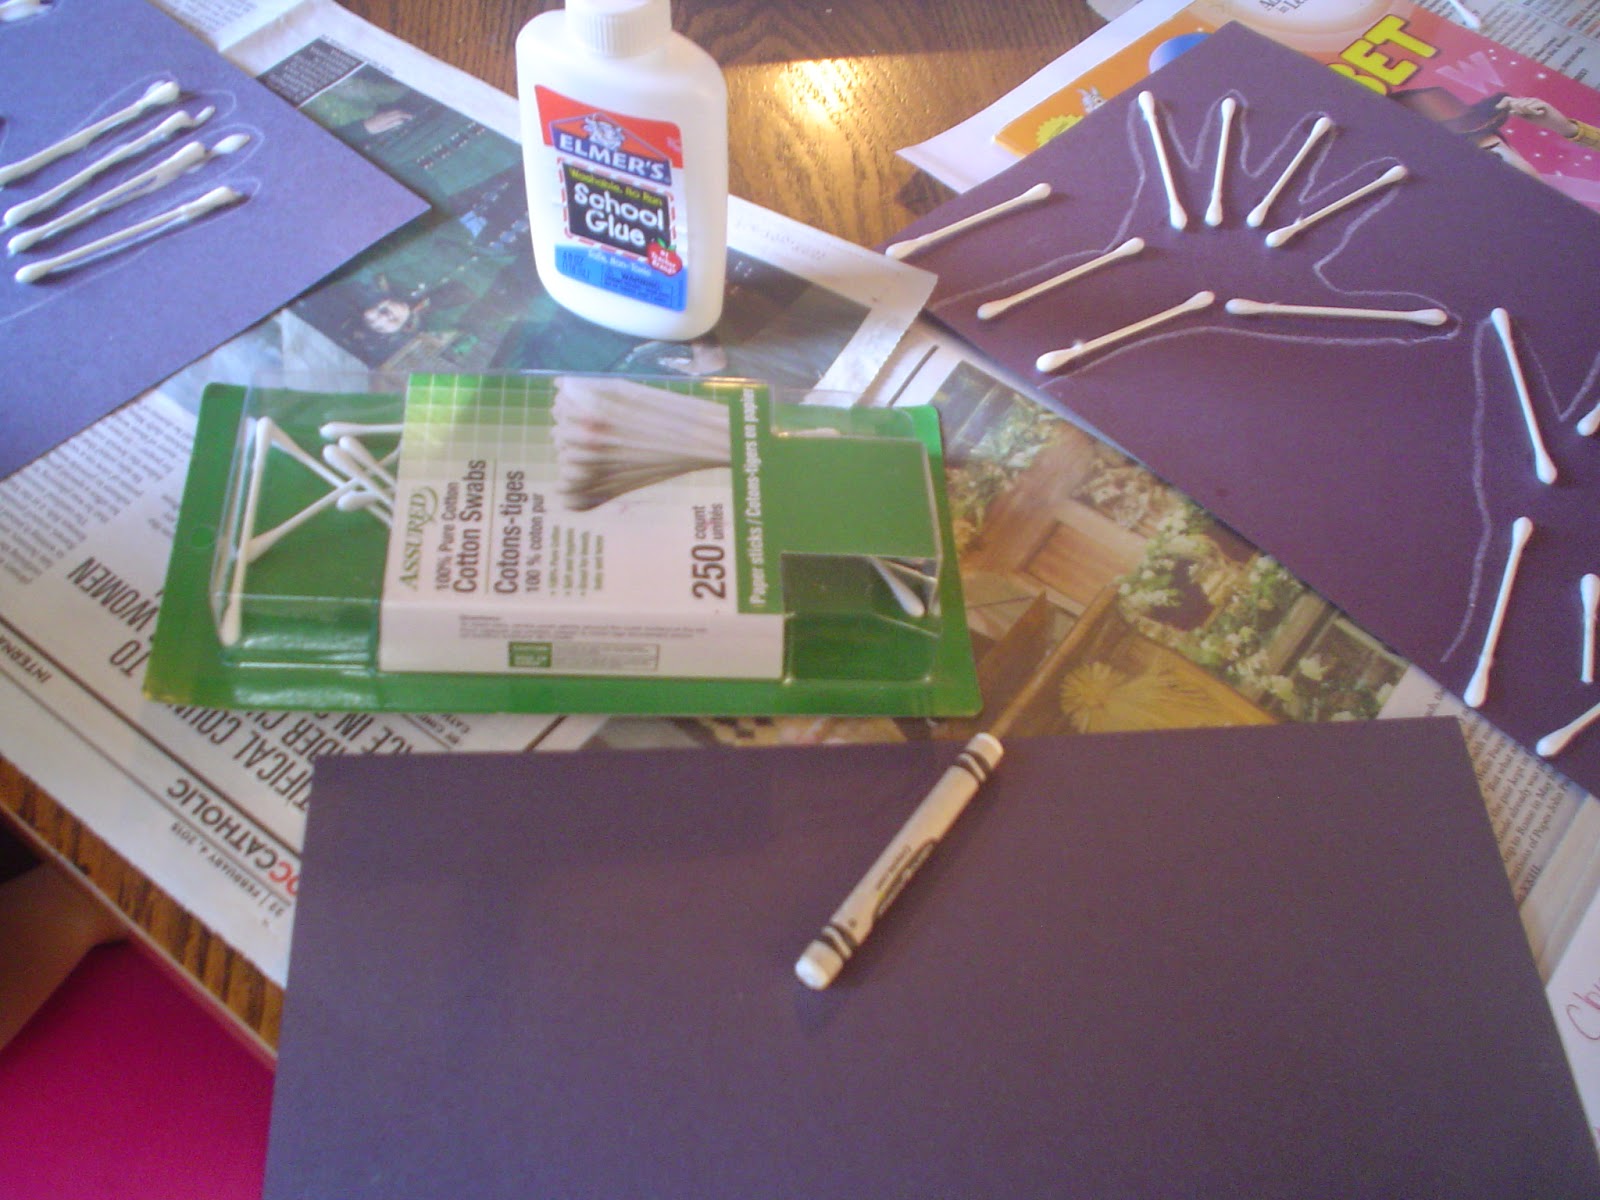
I traced the children's hands/arms with white crayon on black paper. Then they glued down q-tips to look like the bones. It was a fun craft and we also read a book about x-rays before doing the craft so they really knew what the bones would look like. I could have broken the q-tips into smaller pieces to really depict the small bones in the fingers, but for our purposes the full q-tip worked best and we talked about how really there are more smaller bones in your fingers and moved our fingers to see.


No comments:
Post a Comment